This is especially for people who love fabrics but don’t want to sew a stitch! Make one, make many, make them all for your office friends (the ones who are nice to you, anyway).
Ingredients
1) Fabric: at least 9″ by 9″ (Daisy Chain by Amy Butler from Needle and Thread)
2) Mouse pad: Lagis Mousepad from IKEA (or you can use a round/square cork board)
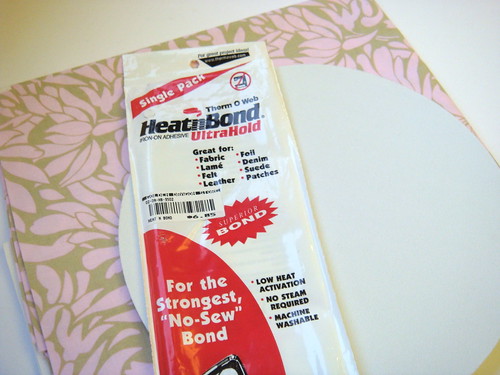
3) No-sew fusible web: Therm O Web Heat N Bond ULTRA (local shops like Golden Dragon, Spotlight)
4) Iron + Ironing Board
Before we begin, Heat N Bond ULTRA is a no-sew fusible web. When you open the packaging, you will find one piece of ‘paper’. It will consist of a smooth side (paper-backed side) and a bumpy side where the ‘adhesive’ part is. Think of Heat N Bond (fusible web) as a ‘double sided tape’ that you would stick first to a poster, peel off the paper pack and then stick it to the wall. Except that Heat N Bond is meant for Fabrics and you will need the heat from a hot iron to activate the adhesive.

Method
Step 1: Cut Fabric
Using the Mousepad as a guide for size, cut around the mousepad with about 1″ allowance all around (i.e. fabric should be about 1″ bigger than pad). You don’t need to be very precise or neat here. We will trim all these away later.

Step 1

Step 1: After cutting
Step 2: Cut Therm O Web Heat N Bond ULTRA
Using the Mousepad as a guide for size, cut around the mousepad with about 1/2″ allowance all around (i.e. HeatNBond should be about 1/2″ bigger than pad). You don’t need to be very precise or neat here. We will trim all these away later. Tip: The heatnbond is cut smaller than the fabric for easy ironing. But it is still cut about 1/2″ bigger than the mousepad.

Step 2
Step 3: Layering Fabric + HeatNBond
Lay fabric Right Side DOWN (the wrong side facing up).
Lay Heat N Bond Adhesive side (bumpy side) DOWN (the paper side up)

Step 3
Step 4: Iron Heat N Bond to Fabric
Apply your hot iron to the HeatNBond (make sure the iron is in contact with the paper backing! You are in for some iron-cleaning if you have messed up Step 3 :P)
Make sure your iron is not too hot. If the HeatNBond crinkles when you touch the iron to it, it is too hot. The fusible web should adhere to the fabric. You can apply even pressure when you move your iron around the layers. Tip: Don’t iron too much, too hot, too long. We will do more ironing in the next steps. Just iron enough to adhere the fusible web to fabric.

Step 4
Flip the fused fabric over. Check that there’s no bumps/creases.

Step 4: After fabric is fused
Step 5: Peel off the paper backing
After ironing the HeatNBond to the fabric. Leave it to cool for a bit. Tip: I would lay the fused fabric on the table top so that it loses the heat more quickly.
After the fused fabric is COMPLETELY cooled, peel off the paper backing carefully.

Step 5
Step 6: Lay fused fabric over mousepad
Place the mouse-pad Fabric side UP, and for the main fabric, the adhesive side should be down (Fabric’s print should face up).

Step 6
Step 7: Iron Fabric to mousepad
Iron the fabric to the the mousepad. Use a Hot setting but do NOT press down for too long. You may cause the foam to warp if the iron is too hot. If the iron is too COOL, your fabric may not adhere well enough. So, increase the heat gradually. Apply even pressure all around the surface of the mousepad.

Step 7
Step 8: Trim
Use a pair of sharp scissors and trim around the mousepad. Be careful NOT to cut into the mousepad foam. You can always trim off the kinks later. Tip: I would not use my best fabric scissors here because the adhesive may gunk up your scissors!

Step 8
TADA! And we are DONE!

This is a very easy handmade project for gifting as well. Simple packaging, paired with a hand-stamped tag and baker’s twine.

I would love to see what you have made with this little project how-to!
Don’t forget: Needle and Thread is giving away one fat quarter for every S$15 purchased. Just quote ‘Midnight Crafts‘ in the comments section when you checkout your shopping cart. What a great deal! This promo ends 31 December 2010.


No comments yet.