Recent Products

Still here…

Happy Easter, everyone!

There are so many updates that I would like to share with you, which I promise I will do so over the next few posts ;> Hint: Shopping in Japan, Fabrics, Stamps and Bags!

Ok. Hubby just signaled that I have 10 mins before we leave for a party… so, lemme show you what’s keeping me up in the (late late) evenings.

Remember the Star QAL monster of a quilt? I finally outsourced the quilting as I was really NOT keen on fighting the Queen-sized quilt on my machine. I’ve decided to gift the quilt (not saying who’s the recipient now), so I’m really happy that the quilting was done professionally and that is also a motivation for me to get it bound and DONE before the end of April.

11 yards of binding

11 yards of binding

Hand sewing the binding down

Hand sewing the binding down

And of course, I NEEDED to start on a new project. That would be the Cathedral Window quilt. Fortunately, I had the good sense to work on a wall hanging size. Man, it is really intense working on this quilt and I find it such a quirky little project! There is a crazy amount of handsewing but I have to look at the bright side of things: no backing, no batting, no quilting and no binding required. PLUS it really does look beautiful 😀

Cathedral Window in Mod fabrics

Cathedral Window in Mod fabrics

Red is my colour

At the other end of the quilt

Alrighty! 10 mins up, gotta run now. Check back soon coz I will be sharing with you some fabric-licious buys I hauled back from Japan! 😀

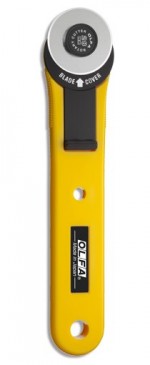
Tools of the Trade

Okay – these items are not really ‘tools’. However they are little-known life-savers for sewers and scrapbookers.

Tame your stash!

Tame your stash!

Recently, I ordered a bunch of Floss Bobbins and storage cases that come with a bobbin winder to help solve my unruly, tangled mess of embroidery floss from my cross-stitching days.

Why floss bobbins?

1) Free up your machine bobbins: I transferred the sewing threads from my almost-empty bobbins to these bobbin cards. The threads on the cards will be used for my handsewing projects.

2) Portability: Carrying threads/floss on the bobbin cards is easier, compared to a large spool that tends to roll off my sewing table. I can stuff the card into my sewing box with no problems at all!

3) Organisation: Organising your thread/floss stash is very easy with the cards which you can label. Best of all, you can wrap the ends of the threads around the ‘legs’ of the bobbins and you don’t get unraveled mess of threads in your stash box!

4) Labeling: Half way through a skein of floss, the label bit with the ID number will DEFINITELY fall off and leaving my remaining skein anonymous 🙁 With these floss bobbins, you label the DIRECTLY on the card. I LOVE THAT!

Here’s a walk-through on how I set-up the winder and got flossing! But the winder is NOT a requirement. You can always wind the thread/floss by hand.

1,000 pcs of floss bobbins

1,000 pcs of plastic floss bobbins

Set up the winder unto the case.

Set up the winder unto the case.

Insert the winder on the ONE side of the case WITH the DIVIDER.

Insert the winder on the ONE side of the case WITH the DIVIDER.

With the empty bobbin, insert side with the hole into the slot of the winder

With the empty bobbin, insert side with the hole into the slot of the winder

Match up the hole in the bobbin with the hole in the winder.

Match up the hole in the bobbin with the hole in the winder.

Insert the little plastic pin into the hole.

Insert the little plastic pin into the hole.

Wind one end of the floss through one leg of the bobbin.

Wind one end of the floss through one 'leg' of the bobbin.

Crank winder, filling bobbin with floss. When you reach the end, wrap the end bit around the leg of the bobbin.

Crank winder, filling bobbin with floss. When you reach the end, wrap the end bit around the leg of the bobbin.

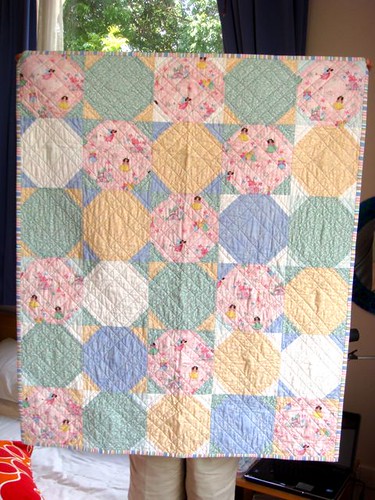
Princess Snowball quilt

The princess snowball quilt was delivered to G earlier this week. It is such a girly sweet quilt.

I gotta make me more baby quilts! The size is more manageable and quicker to piece compared to larger bed quilt.

More straight line quilting, using the variegated thread. I pulled out more fabrics for a couple of baby-sized projects. But those will have to wait a little more as I’m working on a couple of special hand sewing projects. More to show soon! 😀

Zoo-ed Out done done!

Zoo Quilt – Stack N’ Whack blocks. Started around Jul’08 and I finally put in the final stitches over the New Year holiday.

one of my fav. blocks

one of my fav. blocks

This quilt was meant for Benji’s big-boy bed, which we have yet to set it up. It turned out bigger than I originally planned for, because I could resist including the cute prints in the borders!

I’m glad this quilt is done-done. This quilt was ‘basted’ and put away waiting to be quilted for many months. And I had to drag it out of cold storage because I needed to use the curved safety pins to baste the snowball quilt! I thought I could quilt a couple of lines to release some pins, deliver the snowball quilt and return to finish quilting it later. But once I got started, I just could not stop!

I really love this quilt and I think this quilt will be with my baby for a long long time ;>

Goody 2 shoes

This I gotta post even though I have work up to my eyeballs.

They were on SALE! I bought 2 pairs of shoes from the store and even though they ran out of my size for this pair of Twins, I just GOT to have it. For this pair, I settled for 1 size biggier and bought in-soles to make the shoes fit better… Desperate times call for desperate moves ;>

Cross-stitched motifs. STINKING CUTE, eh? 😀