Archive / Tools

RSS feed for this section

In Trays

Our work loft is a little messy right now… With all the recent buys and also new projects, it is a little hard to keep things neat and tidy.

I started on a new project a couple of days back (yes, yet another queen-sized quilt) and so far, I’ve made quite a good progress (by my standards!). During the process, I took my time to cut some blocks, sew some, iron some, square up some… relishing each stage of production (read: I get bored easily). So, there are many mini piles of blocks/patches in various states of WIP scattered all over the sewing area and it was tricky moving the blocks/patches from the sewing machine to the ironing board, etc. And today at Daiso, I found the perfect helper!

These trays are like tubs without lids, and yet I’m able to stack them up. PERFECT. The little lids/catches at the sides are not very strong and I doubt they will hold much weight or many trays, but these trays are soooo handy and just what I need to get the little blocks organised for the sewing table/cutting/iron boards.

At SGD$2 a tray, it is really a good buy!

Here’s a sneak peek at what are in the trays right now:

Fabric Stash Report #2

What a week! I am most glad LAST week was over – had my wisdom tooth extracted (ouchie!), rushed Benji to see the doc for his worsening sinus infection (had to wait an hour because we didn’t have an appointment) and worst of all, we had to fire our live-in domestic helper because she was smuggling men into her room in our house, even while we were all at home (that incident was complete with the police arriving at our home in the middle of the night). I’m glad it is over now.

tapes are so fun! esp. when they retract at high speed.

{pull out & retract} x 100

Well, while the babe was recovering from the infection with the help of Indiana Jones movie-marathon, I managed to cut up some precious (read: in my stash for a while) baby panels, backings and also for a custom crib quilt for a friend’s brand new niece.

Fabric OUT
some for baby panel quilt and for custom Baby R Quilt (crib size)

Fabric IN
ZERO (though I ordered more to be delivered soon!)

Sneaky peak of Quilt Back

Sneaky peek of Quilt Back

This came together very quickly (I love making crib-sized quilts! :D) and I’m loving the colours and look. Blue, pink, plum and brown… yummmm….

Fav. part of the quilting process: Binding

Fav. part of the quilting process: Binding

Week 2: 12 April – 18 April

In: 0 yds
Out: 4.5 yds

YTD total:
Purchased: 18.59 yds
Busted: 4.75 yds
net: -13.84 yds

Fabric Stash Report #1

If I get $1 for saying: I’m not going to buy fabrics for the next <insert #> <weeks/month/year>, I’ll probably be able to get myself a new Bernina sewing machine.

It’s silly, but I feel GUILTY each time I checkout a bundle of fabrics at the store. BUT I try to justify the buys for making things for the Etsy shop, for Benji, for the home, etc. Truth is, I should NOT feel bad about fabric shopping since I hardly spend on clothes, fancy restaurants or expensive holidays. Last year, my ‘resolution’ was to start on a NEW project only after I have completed another. That worked pretty alright since I completed a number of old WIPs.

This year, I’m determined to shed the guilt trip, and buy whatever I like and to complete more projects than I ever had. I came across Jaybird’s bog and I’m pretty impressed with the simple way of keeping track of your stash. I’m not going to account for what is ALREADY in the stash, (or what I bought in Japan in Feb!). I will simply start my report in April.

Here goes:

Week 1: 5 April – 12 April

In: 18.59 yds

Out: 0.25 yds

A quick fabric covered push-pin board

A quick fabric covered push-pin board

YTD total:
Purchased: 18.59 yds
Busted: 0.25 yds
net: -18.34 yds

Tools of the Trade

Okay – these items are not really ‘tools’. However they are little-known life-savers for sewers and scrapbookers.

Tame your stash!

Tame your stash!

Recently, I ordered a bunch of Floss Bobbins and storage cases that come with a bobbin winder to help solve my unruly, tangled mess of embroidery floss from my cross-stitching days.

Why floss bobbins?

1) Free up your machine bobbins: I transferred the sewing threads from my almost-empty bobbins to these bobbin cards. The threads on the cards will be used for my handsewing projects.

2) Portability: Carrying threads/floss on the bobbin cards is easier, compared to a large spool that tends to roll off my sewing table. I can stuff the card into my sewing box with no problems at all!

3) Organisation: Organising your thread/floss stash is very easy with the cards which you can label. Best of all, you can wrap the ends of the threads around the ‘legs’ of the bobbins and you don’t get unraveled mess of threads in your stash box!

4) Labeling: Half way through a skein of floss, the label bit with the ID number will DEFINITELY fall off and leaving my remaining skein anonymous 🙁 With these floss bobbins, you label the DIRECTLY on the card. I LOVE THAT!

Here’s a walk-through on how I set-up the winder and got flossing! But the winder is NOT a requirement. You can always wind the thread/floss by hand.

1,000 pcs of floss bobbins

1,000 pcs of plastic floss bobbins

Set up the winder unto the case.

Set up the winder unto the case.

Insert the winder on the ONE side of the case WITH the DIVIDER.

Insert the winder on the ONE side of the case WITH the DIVIDER.

With the empty bobbin, insert side with the hole into the slot of the winder

With the empty bobbin, insert side with the hole into the slot of the winder

Match up the hole in the bobbin with the hole in the winder.

Match up the hole in the bobbin with the hole in the winder.

Insert the little plastic pin into the hole.

Insert the little plastic pin into the hole.

Wind one end of the floss through one leg of the bobbin.

Wind one end of the floss through one 'leg' of the bobbin.

Crank winder, filling bobbin with floss. When you reach the end, wrap the end bit around the leg of the bobbin.

Crank winder, filling bobbin with floss. When you reach the end, wrap the end bit around the leg of the bobbin.

Oh… I love Olfa

Yes, I do love my Olfa rulers, cutters, blades and mats. Quilting can be an expensive hobby, and Rotary cutting is ONE BIG CULPRIT – the cutting tools burnt a huge hole right through my pocket when I first started sewing and when I purchased them from the local quilt shops.

Nowadays, I help my friends get their cutters, rulers, mats and blades direct from a local distributor, rather than the quilt shops that put a high mark-up on the prices, or suffer the price fluctuations (depending on luck!) on eBay.

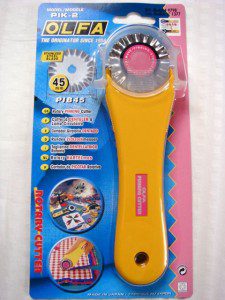
Pinking Cutter - SGD$21.50

Pinking Cutter - SGD$21.50

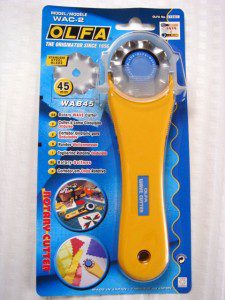
Wave Cutter - SGD$21.50

Wave Cutter - SGD$21.50

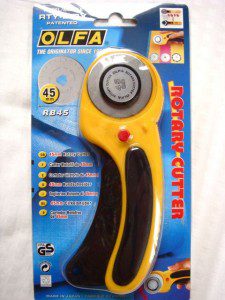
45mm Deluxe Rotary Cutter - SGD$26.80

45mm Deluxe Rotary Cutter - SGD$26.80

I have since put up the supplies at my Etsy store, selling at more down-to-earth prices (if not lower) so that we can help each other stretch our dollars a little bit more. The items in my store are the ‘extras’ that I have to put through to make minimum order amount to the distributor.

For rulers and mats, I can only take on local orders (and I ship free locally!) because of the high cost and fragile nature of the mats/rulers shipping overseas.

Any questions on rotary cutting and the tools, please send them my way! 😀