Updated video: Introduction and review of Olfa cutters + some thoughts when choosing your self healing mats and rulers
Don’t know which Olfa cutter to get and what are the differences between the models?
In this updated video, I hope to address those questions and I’ve included the pretty aqua Splash cutter and the 18mm rotary cutter (great for cutting smaller patches) in this review. You can also see how the blades are switched out for each model. Any questions, please let me know!
To purchase the cutters, you can visit my Etsy Shop. Enjoy 5% discount with coupon code (valid till 31 Dec 2015): YOUTUBE2015
For local mailing (to Singapore addresses), you can shop here in Singapore Dollars contact me for prices for Olfa Self Healing Mats and Acrylic Rulers.
Also, view how I used the 18mm cutters to cut the smaller patches with curves
Some tips when shopping for rotary cutting supplies
1) What materials do you cut with? (light weight, stretchy, thick, etc. 45mm size cutters for most fabrics and 60mm for thicker fabrics)
2) What sizes do you usually work with? (Large size, small handsewing projects – so you can consider which size cutter and whether you require a large mat or large ruler)
3) Do you need to cut parallel cuts of fabrics (e.g. cut width of fabrics folded into 2, or just smaller patterns on the yardage)
4) which mat size to buy? – ASK: How big is your worktop? (which is the LARGEST self healing mat size that will cover that area? My advice is to get the largest size that your table can accommodate)
5) which ruler size to buy – ASK: How big is your self healing mat (My advice is to get the longest ruler that your mat can accommodate)
Often, I will receive feedback from the quilters that they don’t have a large enough work table. I will ask them if they can sit their sewing machine on top of the cutting mat. And when they need to use to the entire area of the mat, they can move the sewing machine away (assuming the machine is portable).
Some quilters set their cutting mat on the dining table or on the floor (not recommended as it hurts your back and potential for accidents when the cutters are on the floor too). The mats have to be stored flat, so as long as they are kept away somewhere safe (a friend stores hers under the TV cabinet when not in use), then no issues.
If you quilt, get at least the A2 sized mats, with the basic rulers of 6″x24″ and 6″x12″ with a 45mm Rotary cutter. This combination will be good enough for your quilt making requirements as it allows you to cut across the width of fabric (about 22″ when folded selvage to selvage). Then add on the large square rulers (for squaring blocks and quilts) and smaller rulers (for working with patches).
Do note that you should use a self healing mat as normal mats may be too hard and that will affect the lifespan of your blades. When using a clearly marked acrylic ruler, you will be able to cut your pieces accurately.
Hope this helps!

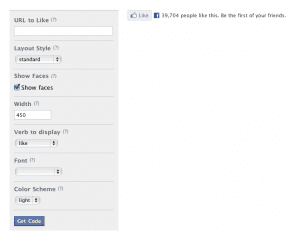
 2.2) Copy the URL of your latest post (I usually click on ‘preview’ link on post on my word press engine and copy the URL, deleting the codes: < &preview=true>) and Paste into ‘URL to Like’ field.
 2.4) Copy ALL the text displayed in the ‘iframe’ box. All the text should be selected when you click on the iframe box. Then you can just right click or press CTRL+C or Command+C to copy.