Archive / Sewing

RSS feed for this section

A couple of busy months…

It has been a while since my last entry. And this blog, quilting, fabrics and sewing have been consistently on my mind! There have been several knitting projects completed (not photographed yet), many yards of fabrics bought (I can’t even begin to keep track of them!) and many projects stated (I need to tweak the WIP column very soon!).

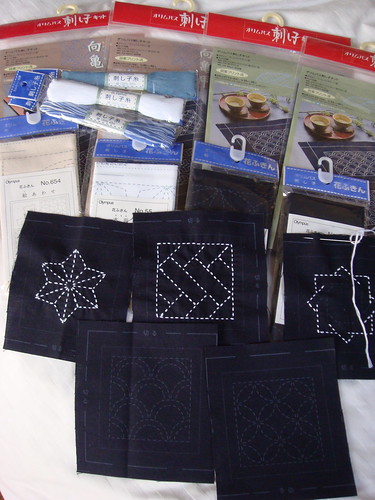
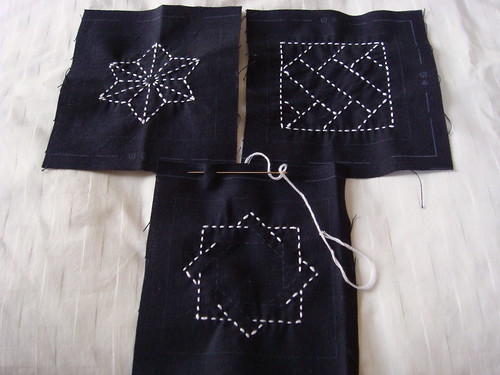
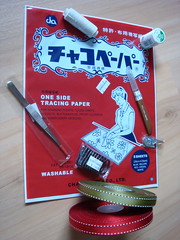
Last week, I found a really neat shop, Sin Hin Chuan Kee, along North Bridge Road. It’s a traditional wholesaler shop (read: old and not great with displays) that packs lots and lots of goodies at great prices. I found Chaco paper for tracing Sashiko patterns, elastic threads, tweezers (for getting paper backing out from appliques), and there are a whole of goodies in the store! I bought 2 reels of ribbons at just about US$1.90 each for X’mas crafting too.

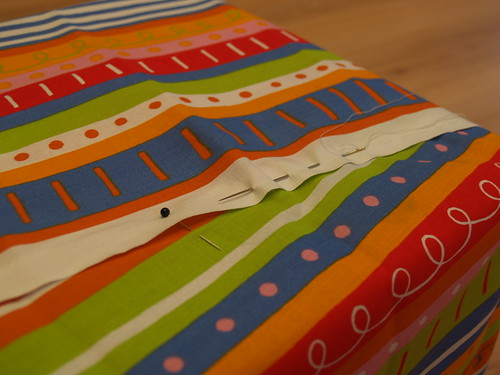
I was packing up my stack of WIP the other night, then I saw my Zoo blocks looking so cheery and bright… and neglected. I remembered planning for the borders to be a deep shade of red. What a perfect X’mas gift for Benji! And I started to get into the swing of things (if I leave it till ‘later’ again, I will not get it done!), and started tracing the fabrics, cutting them, and taped up my layout mat on the wall. I’m now sewing the rows together, then will put up the borders hopefully by end of this week! Yippee!

Fabric Gift-wrap

Last Sunday, we celebrated a crafty friend’s baby girl’s 3rd birthday. I decided to use the remnants of my Ikea ‘mini-bolt’ to wrap up this gift, so that the mummy can have some fun making her little girl stuffs too!

1) The present was first wrapped up with kraft paper first. Then I was deciding if I should use safety pins to pin the folds in place or fabric glue, or a ribbon to tie it all up?! Then DH had a brilliant idea for my to sew everything in place!
2) So, I ‘wrapped’ up the present as you would with your gift wrap paper. And pin and pin and pin the fabric into position.
3) Using a darning needle or similar, run your stitches along the edge of your fabric. Make sure you catch the bottom fabric! This is where the initial brown paper comes into play. The brown paper prevents ‘injury’ to the box when I stabbed too hard through the fabrics, etc.
As for the thread, I just use a single strand of polyester-cotton thread to sew this baby. No need to use strong threads as I wanted the gift recipient to be able to rip out the threads easily, and not damage the fabric!
You can consider the stitches to be almost like ‘basting stitches’, instead of real quilty stitches ;>
Lastly, I pinned a gift tag to the present with a curved safety pin. Sorry, no pic here. Did it on the fly just as the gang was at the door waiting to go for the party! :>

Baby Quilt Top Done! Yaay!

Phew! My Gram’s Fairy Tale baby quilt is done! I bought this kit from Fabric.com ages ago, and I’ve been progressing slowly with it for a long long while. I mentioned this quilt previously in a post here.

I dug it out of cold storage and started working on it again. The tedious bit was joining the triangles that made up the outer borders and joining them to the main body required some concentration – matching points, making sure that the points don’t get cut off, easing in, etc…
Amanda Jean inspired me to work on this baby quilt with her Theme of the week. Although I’m a couple of days late in delivering this baby, there’s nothing for me to lose as the top is now completed! :>

The instructions are clear and easy to follow and I do love the blocks and the fairy tale prints. I’m looking forward to basting and quilting than the Queen-sized Star QAL one :p
Sorry for the poor lighting again. Took this picture at around 3am in the morning when I put in the last stitch in the border. Well, the title of my blog is MIDNIGHT CRAFTS indeed! ;>

Star QAL Top DONE


Okay, I’m sorry that I could not take a better picture. But the weather has been dreary and wet for the past 2 days and I only have my mobile phone handy now :p I will try to get a better picture when I have more hands on deck to hold this baby up! :>

The top is DONE DONE. I’m so glad!!! But it is HUGE. My back is already aching just THINKING of the basting I have to do on my hands and knees :p

I’m not in a hurry to quilt this one yet. I will probably quilt it when I complete my Zoo Stack and Whack baby quilt top, buy a few more needles and get into the mood before I tackle the quilting.

Thanks to AmandaJean, this has been fun, fun, fun :> Yes, its true that you can work out a quilt all by yourself. But when you have so many others quilting along with you, and someone committing herself to lead this project, you appreciate the effort and heart in this :>

Already looking forward to the next project! WOOHOO!

About Stars and Sashiko

I’ve made some progress with my Star Quilt-A-Long project and I’m happy to say that I have completed all 30 blocks and cut up all my sashings/cornerstones, waiting for sewing now :>
There has been a number of completed tops at the group’s flickr folder and I thought that the quilt is ‘too square’ to fit into any rooms in the house. haha. A quick calculation shows that I can turn this into a Queen-sized quilt with an additional row. So, I added 2 more Stars and 3 more setting blocks.
And I also took some time to pick out my border and backing fabrics too, and they are washed and ready to go when I’m done piecing the top together.
You can see the preliminary layout below, without the sashings/cornerstones/borders. I have a piece of tape on each block to indicate which row/column they belong to, so I don’t have to bother with laying them out again until they are joined.

Here are my 2 additional blocks – Dutchman’s puzzle and a 9-patch star.

Recently, I found that my quilt shop carries Sashiko needles and I got really excited (for nothing). Unfortunately, the shop does NOT carry the Sashko kits/fabrics or even threads. It has been very painful looking for Sashiko stuffs in our local craft shops . And that of course gave me an excuse to shop online ;> Bought a bunch of placemat kits, some samplers and also sashiko threads. Of course, I did not have the patience to get my camera and snap a picture of the parcel as-is, but I remembered to take a pic of my spree here after I started stitching on a few coasters.

I felt that the threads supplied in the kit are not as good as the ones that you buy ‘ala carte’. They seem to be more loosely twisted and a bit harder to pull through the fabric. So I’ll probably just buy the sampler or the marked fabrics in the future. This is my 1st attempt at Sashiko sewing, though I’ve known of it for a while. Never got the chance to try my hands at i till now, because they are almost impossible to find in Singapore.

Then I visited the bookstore and bought The Ultimate Sashiko Sourcebook by Susan Briscoe which is really packed with loads of Sashiko history and patterns for reference. I. Love. It.

Loads of WIPs since the beginning of the year, and I sure hope I have more finished projects to show for in the coming months.
Thanks for sewing with me!