Archive / Fabrics

RSS feed for this section

Full Circle

Yes, yet another new toy :> I’ve been collecting all these ‘sewing toys’ like how we are collecting Thomas train sets for Benji :p I HEART my sewing toys ;>
Here’s a ‘must have’ tool for cutting circles! It’s the Olfa rotary circle cutter which I bought at Popular Bookstore during their year end sale.

This circle was cut WITHOUT any stabilizer, freezer paper, etc. It just works! I used it for the self covering button bought at Spotlight many moons back.
I’m already planning another project cutting up circles from my scraps for a home decor project. Hopefully I’ll get to that soon! :>

Denyse Schmidt – Mix-it-up coasters

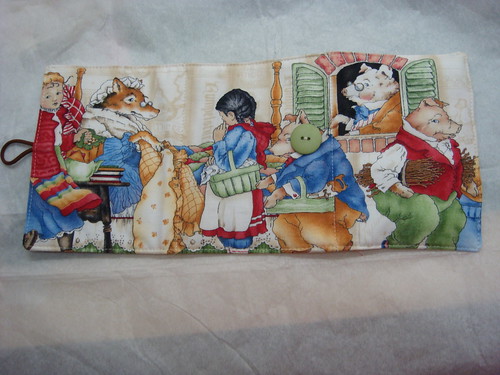
One of my favourite crafty books is this one. It inspires me a lot, in terms of colours, designs, etc. More of all, it shows me that sewing/quilting should be done YOUR WAY. No quilt police to tell you that your sewing must be 100% accurate, that your colours must consist of this & that, that your blocks must be true & true traditional, etc. The quilts are very different from the ones I see displayed at the quilt shops/workshops. DS’ quilts are so refreshing & modern and I simply want to try each and every one of them.
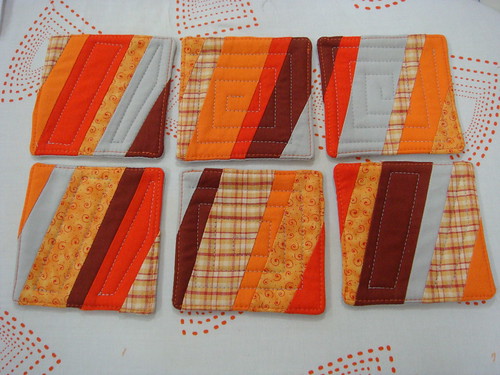
After many months of book-ownership, DS flickr-group browsing, I finally decided to create something out of her book for a friend’s new home. COASTERS! I know, I know. It’s nothing challenging or great as a quilt or some of her other quirky project, but this gal gotta start somewhere, okie? ;>
Well, looking at the book, I thought: geez, I can make these coasters in 15 mins. I was SOOOOOO wrong. I ended up slaving away the entire evening over this set of 6 coasters.
Step 1: Enlarge pattern design
Step 2: Roughly cut up the pieces from the pattern sheet
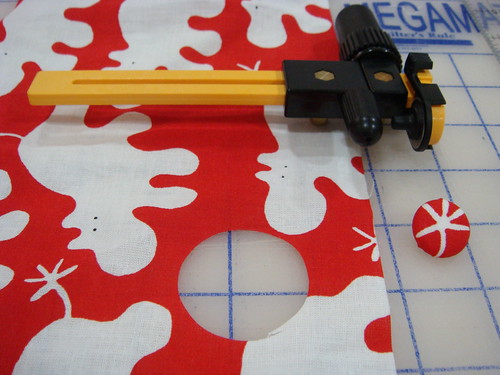
Step 3: Stick each piece on a plastic template sheet & trim
Step 4: Punch out the points where the 1/4″ seam lines intersects on all sides of the templates (6 pcs)
Step 5: Pick out 6 different fabrics
Step 6: Cut out fabric rectangles & stack them
Step 7: Trace pattern (mark out the 1/4″ points too) on the top piece of fabric with water soluble pen & then cut them out. I rotary cut the 6 layers of fabrics.
Step 8: Switch the pieces around to make sure each top will have a different combination of fabrics.
Step 9: Match points, pin, sew, iron, repeat again & again & again…
Step 10: Square up
That’s just for making the coaster tops. When I finally made them into cushy coasters and quilted them, it was just sooooo sooooo satisfying. Overall, the coasters are just nice for the couple’s new home, which has a comfy basement/entertainment room, with orange walls, some nice grey tiles… I picked the fabrics with their colourways in mind… And I think my friend appreciates them, so I’m happy. :>

Okay, another house-warming coming up next week. More coasters??? :>

1st post of 2009!

It’s been a LONG while! Well, it had been a busy Christmas, my hubby & I worked through the New Year and now we having the Lunar New Year coming up next Monday! Gosh… I need a holiday from all the holidays!
Found time to start a new project at the beginning of the year, though. More updates when it gets closer to a better shape to be shown! 😀 And I also indulged a ‘little’ online retail therapy, which arrived last week!
Over the Christmas period, I managed to sew up a few made-with-love (read: wonky sewing) items for some special people.
Remember the cupcakes fabrics? I made the crayon wallet for a friend’s little girl since it was such a big hit with Benji :> I LOVE LOVE LOVE how sweet this wallet turned out.
For another creative little 3 YO, I made the crayon wallet with the scraps from Gram’s Fairy Tale baby quilt and it turned out perfect (in my opinion! :p)

I believe I will continue to make more of these wallets for more of our little friends! :>

Fabric Gift Wrapping 2

Here’s a package of booky-goodies going to a friend in New York. Her family has moved from Singapore for almost a year now, and we bought some Chinese books for their 3 little ones, sort of like helping them to get in touch with their ‘Asian Roots’, so to speak :>
This came from Ikea’s ‘mini-bolt’ which I love to buy. I used another one when I used fabrics to wrap a gift for another crafty mama’s baby party.

This fabric wrap is a little more ‘structured’. I based it loosely on a pattern in this book and while I don’t have linen & silk, I do have loads of Ikea’s cotton fabrics ;> The length of the ribbon is much shorter though, but given the thickness of these ribbons, I don’t wish to add too much bulk to this parcel. Keeping it S I M P L E and S H O R T.
9 more days to Christmas! :>

Cupcakes, anyone?

Now, who can resist a Spotlight sale? 20% percent off… I’ve expected the shop to be a scene of madness again, especially when it was the Hari Raya Haji holiday last Monday. While I was there for the buttons (for projects that I can only reveal after Christmas), I caved in and bought some poplin fabrics and felt too. The solids bundled on the right were picked up from Golden Dragon earlier in the day :p

Yummy…