November 29th, 2008 Benji started to make a grab for our pens and pencils many months ago. So, we’ve invested in washable crayons for him to go crazy with. But he is limited to colouring only when we are at home, and at his little table, because we are so paranoid about losing the crayons in our bags and creating a mess, etc.
I chanced upon
Jennifer’s blog and she had created a crayon wallet tutorial – on sale at her Etsy store. It’s great! Now, I can carry a scribble pad along with Benji’s crayons, and it comes with a pocket to keep his masterpieces too :p
I used up some Ikea ‘mini-bolts’ left over from my quilted table toppers – more about that in a bit – they are not expensive and allow me to work on ‘test-projects’ :>
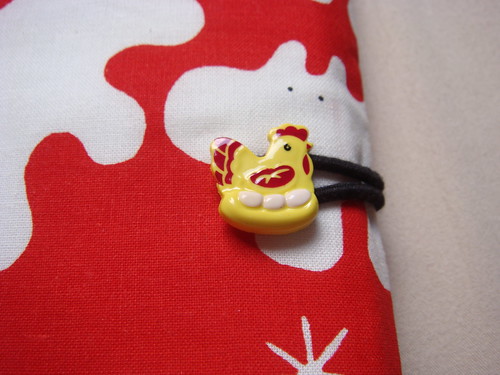
I’ve had these little chicky buttons for the longest time. I don’t have a large button collection, and with projects like these, its a good excuse to go shopping now! ;>
I tried fitting in Benji’s LARGE crayons but they were a little too tall for this wallet. The size is just right for the regular sized ones. But I’ve already ‘discoloured’ the wallet and side of the pad. But no worries, I expect this wallet to be filled with crayon bits and streaks sooner or later anyway ;>
The pad was supposed to fit the pocket on the right side. But I did not check if I had the pad that was the size of the pocket dictated in the pattern. But fortunately, the center pocket could fit the note pad (I had tons of these left from a fund raising event) well.

Overall, I’m very happy with how this turned out. I’ve bought Jennifer’s other pattern for her quilted list-taker. Looking forward to see how that will turn out! :>
1 Comment "
November 10th, 2008 I’ve been complaining A LOT these days that the malls are putting up X’mas decor earlier each year.
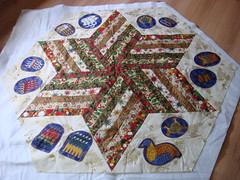
On the other hand, I’ve been keeping my eyes open for X’mas gifts, planning schedules around the holidays and also keeping a list of things that I will need to do, clean, craft in time for X’mas. The X’mas tree skirt pattern caught my eye when I was at the local quilt shop. I attended a couple of sessions at Quilts and Sew Forth and this is what I have done up so far! :>
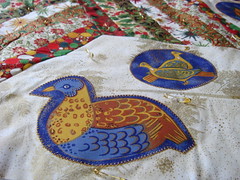
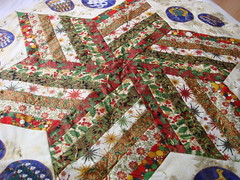
The creases you see are due to the folding and packing. I chose 7 different X’masy fabrics and a lovely beige/gold background fabric. I chose to cut out the 12 days of X’mas gifts from a panel for the applique, instead of tracing, and hand appliqueing other designs from scratch to the tree skirt. I simply used some Heat & Bond and machine sewed them with a blanket stitch. Quick & Easy! :>
The skirt is now basted and I will machine quilt this baby after I have joined the blocks for Benji’s Zoo quilt. I’m looking forward to this skirt gracing our X’mas tree this year :>
No Comments "
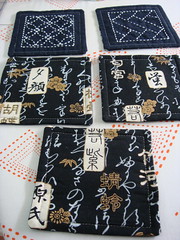
November 10th, 2008 Finally got round to completing the set of 5 coasters after choosing the backing fabric. Although the Sashiko coaster kit just require you to sew up the sides without any batting or backing, I chose to add on a lightweight iron on interface and a backing fabric.
I chose a dark Japanese print Kaufman fabric (almost black) with Kanji prints on it. I feel that it brings out the Japanese-ness of the Sashiko stitching.
I’m looking forward to completing the rest of the Sashiko kits!
4 Comments "
November 10th, 2008
It has been a while since my last entry. And this blog, quilting, fabrics and sewing have been consistently on my mind! There have been several knitting projects completed (not photographed yet), many yards of fabrics bought (I can’t even begin to keep track of them!) and many projects stated (I need to tweak the WIP column very soon!).
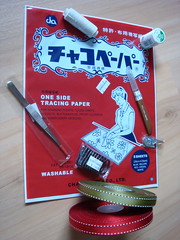
Last week, I found a really neat shop, Sin Hin Chuan Kee, along North Bridge Road. It’s a traditional wholesaler shop (read: old and not great with displays) that packs lots and lots of goodies at great prices. I found Chaco paper for tracing Sashiko patterns, elastic threads, tweezers (for getting paper backing out from appliques), and there are a whole of goodies in the store! I bought 2 reels of ribbons at just about US$1.90 each for X’mas crafting too.
I was packing up my stack of WIP the other night, then I saw my Zoo blocks looking so cheery and bright… and neglected. I remembered planning for the borders to be a deep shade of red. What a perfect X’mas gift for Benji! And I started to get into the swing of things (if I leave it till ‘later’ again, I will not get it done!), and started tracing the fabrics, cutting them, and taped up my layout mat on the wall. I’m now sewing the rows together, then will put up the borders hopefully by end of this week! Yippee!
No Comments "
September 8th, 2008 Last Sunday, we celebrated a crafty friend’s baby girl’s 3rd birthday. I decided to use the remnants of my Ikea ‘mini-bolt’ to wrap up this gift, so that the mummy can have some fun making her little girl stuffs too!
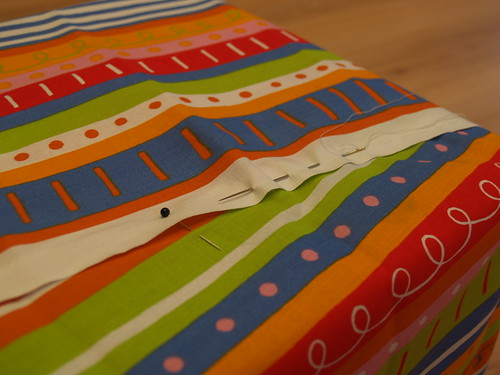
1) The present was first wrapped up with kraft paper first. Then I was deciding if I should use safety pins to pin the folds in place or fabric glue, or a ribbon to tie it all up?! Then DH had a brilliant idea for my to sew everything in place!
2) So, I ‘wrapped’ up the present as you would with your gift wrap paper. And pin and pin and pin the fabric into position.
3) Using a darning needle or similar, run your stitches along the edge of your fabric. Make sure you catch the bottom fabric! This is where the initial brown paper comes into play. The brown paper prevents ‘injury’ to the box when I stabbed too hard through the fabrics, etc.
As for the thread, I just use a single strand of polyester-cotton thread to sew this baby. No need to use strong threads as I wanted the gift recipient to be able to rip out the threads easily, and not damage the fabric!
You can consider the stitches to be almost like ‘basting stitches’, instead of real quilty stitches ;>
Lastly, I pinned a gift tag to the present with a curved safety pin. Sorry, no pic here. Did it on the fly just as the gang was at the door waiting to go for the party! :>
1 Comment "